Mom’s DIY Nook
Today I will show you how simple it is to paint your own sign. This is something anyone can do with a little practice. I have suggestions on product and tools you can use, however you will need to do some exploring yourself, to find the things that will work best for you. Now let’s have some fun!

Step One:
Pick out a some wood, this particular sign is 24’x12’x3′. I use recycled wood mostly, mainly because we own a fence company, and I got tired of seeing the left over wood end up in the burn pile. For this sign I use the 1”x4”x4” Gothic pickets, you can purchase from any home improvement store. If I were to buy, I would purchase from Lowe’s. You don’t have to cut your own wood if you don’t have a saw, Lowe’s will cut it for you. Feel free to use Pine, and not pickets. I like the aged look, that’s why I use the pickets.
First, I use pre cut 1”x2”, I cut them just a little bit shorter than 24”, this way you don’t need to cut the wood again, if you can see the wood after the sign is complete. I line the wood up best I can and put them approximately 6” apart, as you can see in my sample.
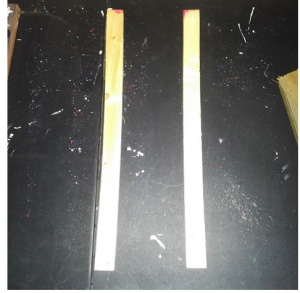
I try and keep it close to this folding line in my table, it helps. You can use a board or a yard stick, anything with a straight line for a guide.
Step Two:
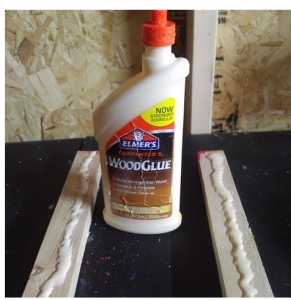
I lay down a generous layer of Elmer’s wood glue, any kind of wood glue will work, you will find what best works for you.
Step Three:
I take my precut boards I cut from my fence pickets and start laying them on the glue. Again, you can omit steps 1-4, if you use pre cut pine 24”x12”x1”.
Over hang the first board on the glue, by doing this, the last board will over hang off the 1”x2” boards and the will not stick out on the top or bottom of the sign.
Step Four:
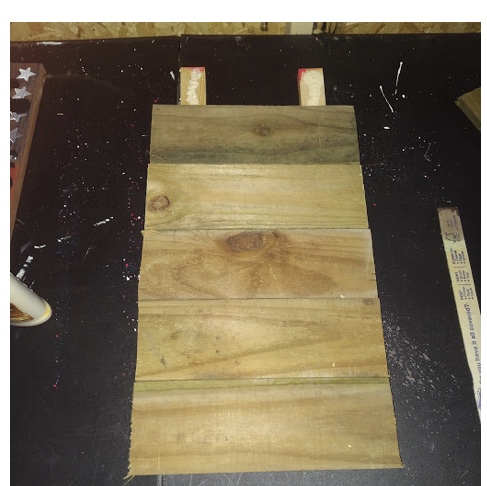
Now, you will need some kind of weight on the glued boards so it will stay in place and adhere better. I place a piece of 24”x2”x1” directly on top, this will distribute the weight evenly over the whole surface of the sign.
After this, I place some kind of weights on sign over the top of the pine board. I let it dry over night, 24 hours would be the best.
Step Five:
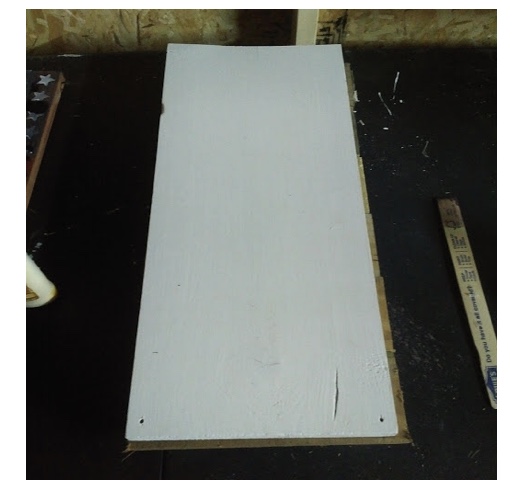
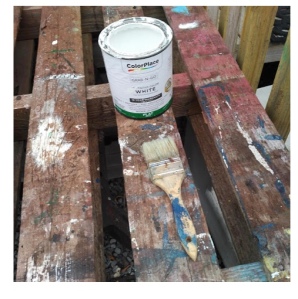
This step I will prep the sign, you can use any color paint you want to, just keep in mind, the lettering colors, and make sure they are in contrast, so the sign will be easily read.
I always use flat acrylic paint. The stencil will be easier to hold, and keep in place while painting, with less sliding around. Gloss paint does not work as well. Again, you will discover what will work best for you.
I start in the middle of the board and apply a generous amount from top to bottom. After that, I start to lightly feather the paint onto both sides of the sign. While feathering, paint with a very light hand, lifting the brush when you get towards the edge. By doing this it allows part of the wood to show through the paint, I prefer this, because the sign looks more weathered, and that’s the way I like some signs to look. You can paint solid, it will be your own preference.
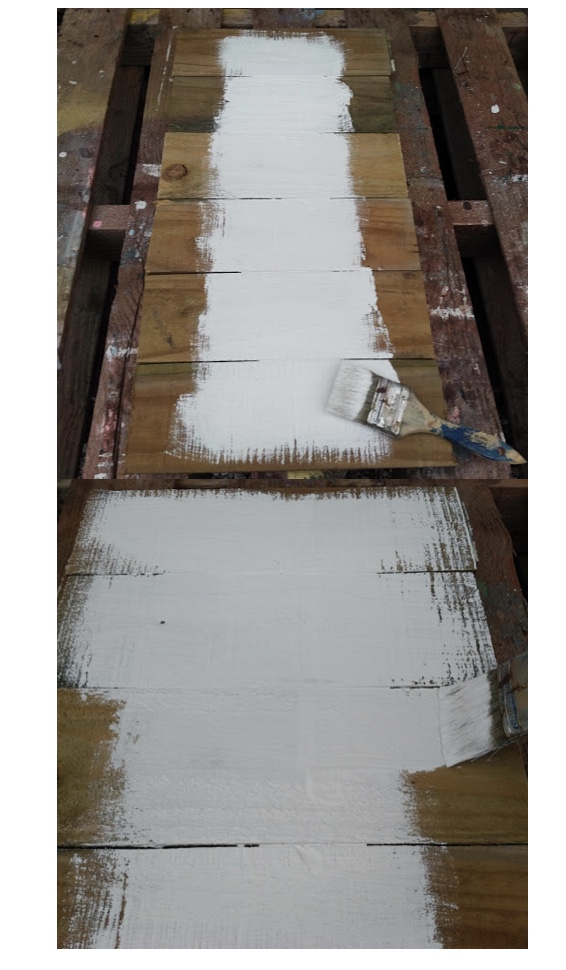
After the feathering is done, you can go back a add more paint to the sign avoiding the edges. I need to do this because the wood I use is very porous and adding more paint somewhat smoothes the wood out.
Let the paint dry completely before you move onto step Six.
Step Six:
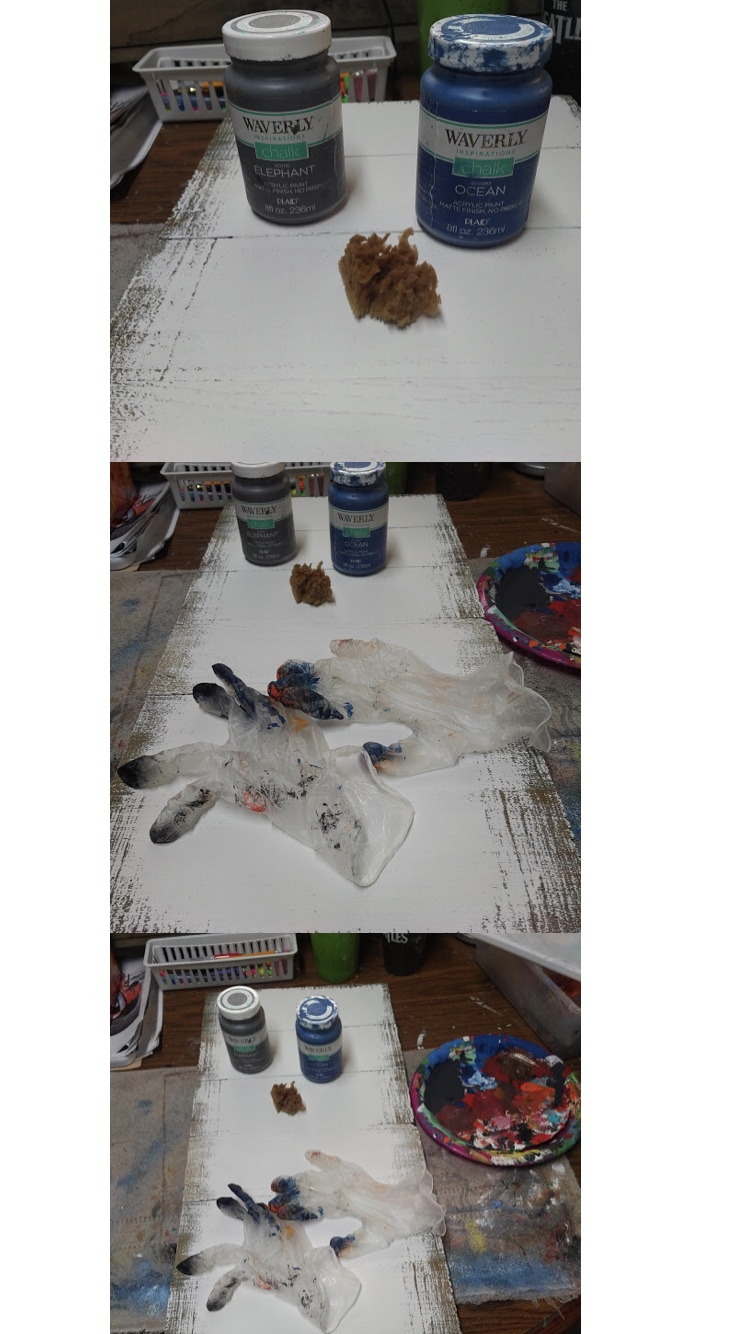
In this next step, you will chose the colors you want to make your sign. You will also gather your tools. Keep a cup of water close to put your paint soaked sponges and brushes in, do not let paint dry on your tools. If you let the paint dry on the tools, you will need to throw them away. I will use the same tools over and over, I wash everything immediately after I am finished. I always use a different color for the word, and the words, “Love and Heaven”, by doing this, the words stand out more.
I always lay my sign on a towel, this will help when you are blotting the paint on the stencil, and it will help with the sign rocking back and forth.
I chose my color, and paint. I like the chalk acrylic paint because it is very thick, and when I blot carefully, it will not bleed through the stencil.
I also use the sea foam sponges, I have found, by lots trial and error, and using other types of sponges, the sea foam sponge, works the best for me.
Also, another tip is to wear plastic gloves, stenciling is a very dirty job and if you do not use gloves, you will end up with paint all over your fingers and hands.
You will also need a paper plate, or something to dab, to remove excess paint.
Step Seven:
Now it’s time to position the stencil on the sign. I can just eyeball ball it. If you are more comfortable by measuring, by all means positing the stencil however you are comfortable with.
After you have the stencil positioned, it is time to start blotting the paint onto the sign.

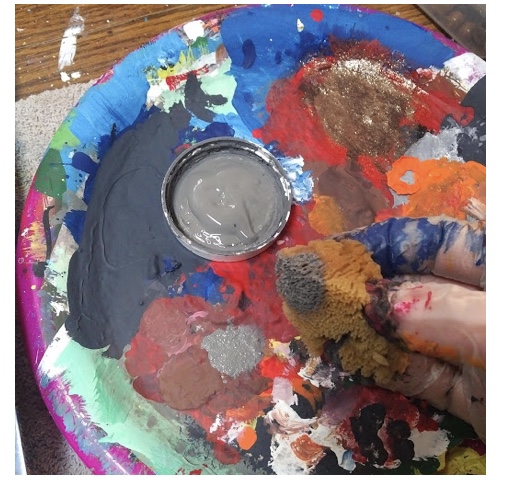
I shake the paint real well, and I leave a blob on the cap, I use the cap to get paint on my sponge, then, I blot my plate to get the excess of my sponge.
I will do a light coat, the whole time using my other hand to hold the stencil in place, this is very important, you don’t want a word to look, double versioned. You can sponge more color in, to your desired look after it dries a little bit. If you are more comfortable taping the stencil to the board, do so.

After you are done with the first color, put your sponge into the glass of water right away. It will make cleaning the sponge easier after is soaks in the water.
Time to start on your next color. Follow the same step, with a clean sponge, and get the second color on your sign.


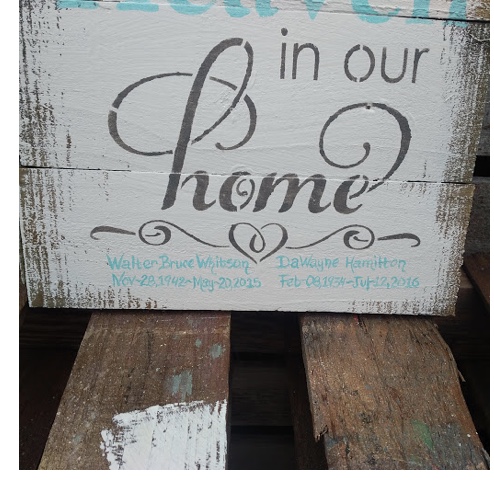
Congratulations! You have completed your sign.
If you want to push your new talents, move onto step eight. I personalize all of my Heaven Signs, because I make them to order from our Etsy site, https://www.etsy.com/shop/LittleSuminSumin
Move onto step eight.
Step Eight:
I personalize these Heaven Signs because it help people who have lost loved one to pay tribute to them. These signs are a way of helping them to move on, but also keep their lost loved ones alive with a memorial.
I use the same color paint as the, “Heaven and Love”. I take a tiny paint brush and paint what the customer wants, you might want to do this on your new sign to remember a loved one you lost.
Thank you so much for your time, and I hope this helps. please feel free to ask any questions, make any requests of something you might want to learn. We are here to help each other and most importantly, learn from each other!
Also, Look us up on FB “LittleSuminSumin”, and check out our
Blog, https://alittle-sunshine.com/, we will take requests for DIY anything.
XO

I love it!😍
LikeLiked by 2 people
Thank youuuu!! ❤️❤️
LikeLike
Thanks for this post Britt. I lost my Mom only a week ago. I saw your post when I was grieving. I am now able to regain myself and accept how things are now. It is a beautiful sign, thank you for sharing💗
LikeLiked by 2 people
Awww I am so sorry to hear that. 😦 I lost my grandma a couple years ago and not a day goes by that I don’t think about her. My mom and I are extremely close. She is my best friend, so I can’t imagine that feeling of losing her. Thank you for the compliment, my mom actually made the sign 🙂 . I am here for you if you ever need me , or even just for a talk . Big hugs to you Diana! ❤
LikeLiked by 1 person
Thank you so much Britt. I’m so grateful for everyone’s support. I’m sure you do this, but always make it a point to see your parents as much as possible. My sister and I had the viewing yesterday and I was with her today at the cremation facility. This was so sudden for me and my family. I know one thing, we make our plans and God makes his. My brain is still in a fog, I still hope to continue to write soon. Thank you for being so supportive Britt, hugs and love to you too!
LikeLiked by 1 person
That is so well done!!
LikeLiked by 1 person
Thank you! We have a shop on Etsy and this is the by far the most popular item 🙂 .
LikeLiked by 1 person
I’m sure you are making it more popular!! 😛
LikeLiked by 1 person
I’m trying 🙂 I know it’s getting more business but I’m not sure if it’s from the blog or not 🤷🏻♀️☺️ hehe
LikeLiked by 1 person
It’ll be don’t worry 😂
LikeLiked by 1 person